Showing posts with label dairy free. Show all posts

Thursday, 12 December 2013

Super Easy Holiday Spice Balls


Last night I hosted my very first ever, holiday themed wellness seminar. I had such a blast sharing my favourite holiday goodies - all gluten free and vegan and as healthy as can be. I couldn't wait to share this recipe for these easy-peasy holiday spice bites.

The recipe is super flexible, and you can basically use whatever dried fruit and nuts you have on hand. Be warned, however, that different nuts will provide different results due to their fat content.

Holiday Spice Balls


Makes 12-14 tbsp sized balls

Ingredients

1 cup raw almonds, cashews or walnuts
1 cup pitted dates or dried apricots
1 tbsp raw cacao powder
½ tsp cinnamon
pinch of sea salt
½ tsp peppermint, vanilla, or other extract (optional)
Toppings: raw cacao powder, ground almonds, cinnamon, etc. (optional)


Directions

  1. Combine all ingredients, except toppings (if using) in a food processor or high speed blender
  2. Roll into tablespoon sized balls between clean hands
  3. Lightly roll balls in topping of your choice, if using


Notes

This recipe is very flexible. Feel free to experiment with different nuts, spices, and toppings!

Use caution if using nuts with a high fat content (e.g cashews, pecans). The longer the ingredients mix, the more oil is released, and the result may be softer than desired.

Wet hands before rolling into balls to prevent sticking.

Raw cacao powder can be found in most health food stores and is an amazing superfood packed with antioxidants.

Regular cocoa powder will work fine for this recipe if you don’t have raw cacao on hand. Carob powder would also substitute well for those sensitive to chocolate.


This recipe was inspired by fellow holistic health coach Kasey J. Smith.

Saturday, 30 November 2013

Spiced Apple Breakfast Bowl


Breakfast is by far one of my favourite meals of the day. What we fuel our bodies with in the morning sets the tone for the rest of our day. This breakfast bowl has been one of my go-to recipes lately. It has the perfect blend of seasonal spices, and with lots of healthy carbs and good fats, it's perfect for days where you need a little extra fuel to last you through the morning.

Spiced Apple Breakfast Bowl


Ingredients

1/4 cup oats
2 tbsp chia seeds
1/4 tsp cinnamon
1/4 tsp nutmeg
1/4 tsp ground ginger
1 cup non-dairy milk (hemp, rice, almond, etc.)
1 medium apple
2 tbsp raisins
2 tbsp chopped walnuts or pecans
1 tbsp shredded coconut
drizzle of maple syrup (optional)

Directions

Mix oats, chia seeds, spices and milk in a small bowl, and let sit about 5 minutes for the chia seeds to expand and absorb some of the liquid.

While waiting, chop apple into bite sized pieces.

Once oat mixture has slightly thickened, top with remaining ingredients.

Dig in, and enjoy!

Friday, 22 November 2013

This All Natural Hot Chocolate Will Blow You Away!


If you've been following me for a while, you'll know that I love chocolate. Remember my post a while back about raw chocolate?

Well - things just got real.

Now that the winter months are upon us - at least here in Calgary - I've been craving all sorts of warm, delicious (yet healthy) treats. Once I discovered this decadent hot chocolate, I knew I'd hit the jackpot. The best part is that all of the ingredients are REAL! That's usually enough for me right there, but it's also super easy to make, and so deliciously creamy and delicious.

All you'll need to make this are a few simple ingredients that you may already have, and a blender! I used my vitamix, but any high speed blender would work.

All Natural Hot Chocolate

serves 2

Ingredients

3 cups hot water
6 dates, pitted
1/4 cup raw cashews
2 tbsp raw cacao powder (see notes)
1/4 tsp cinnamon
pinch of cayenne (optional)

Directions

Combine ingredients into high speed blender, mix on high for 30-40 seconds.
Serve warm in your best mugs and enjoy with someone special.


Notes

If you don't have raw cacao powder on hand, I highly recommend you head out to the closest natural foods store and get some. It's unbelievably high in antioxidants, and is the purest form of chocolate - what all the candy bar chocolate originally came from. If this is not an option for you, for whatever reason, regular cocoa powder that you would use to bake with would work just fine.


Sunday, 10 November 2013

Curried Chickpea Hummus


I was recently inspired by a container of store bought curried hummus that didn't last very long before I polished it off all by myself. I'd never even imagined this particular flavour combination, and I was pleasantly surprised by it's deliciousness. I thought, instead of paying $4+ for a small container of the stuff, why not recreate it at home with real ingredients?

This hummus is so delicious, and since you're making it yourself you have control over exactly what goes into it. Perfect for someone who may not be sold on the whole curry flavour in a hummus (I assure you, it's surprisingly delicious). Full of healthy fats, fibre - and in this case, immune boosting turmeric - this versatile dip is not only tasty but oh so good for you too!

Here's the recipe:

Curried Chickpea Hummus


Ingredients

1 tbsp coconut oil
½ small yellow onion, diced
1 tsp curry powder
½ tsp turmeric
½ tsp cumin
¼ cup filtered water
2 cups cooked chickpeas (or 1 15 oz can)
1-2 tbsp olive oil
¼ cup tahini
1 tsp raw honey
2 cloves garlic
½ lemon, juiced
¼ tsp good quality salt


Directions

Melt coconut oil in a frying pan on medium heat.
Cook onions until soft, about 3-5 mins, stirring often.
Add curry powder, turmeric, cumin and cook for another minute.
Add water to pan and stir until water is mostly evaporated, about 5-8 mins


Not the prettiest picture, but here's
what the curried onions should look like when done

Combine all ingredients (including curried onions) to a food processor, and blend on high until smooth.

Serve with veggies, crackers, in a wrap or however you choose!


Notes

  • Turmeric is powerful, in more ways than one! If you use wooden or plastic utensils like I did, make sure you wash them as soon as possible. If not, you might have to put up with a yellow tinge on your kitchen tools from the brightly hued spice.

  • Why the two oils? I cooked the onions with coconut oil instead of the olive oil that is called for later in the recipe because coconut oil is a much more heat-stable oil to cook with, meaning it isn't as easily denatured compared to other oils, such as olive oil. This denaturing can be very bad for your health, with some people believing such oils become carcinogenic (cancer causing) when they are heated. Olive oil is best enjoyed in it's natural state, and can provide some great health benefits if it remains this way. On that note, when choosing your olive oil, make sure you opt for one that has been cold pressed in the manufacturing process. Otherwise, it will likely have been heated (and therefore denatured) before it even gets to your kitchen.


Thursday, 31 October 2013

Spooky Black Rice with Carrots and Roasted Acorn Squash


HAPPY HALLOWEEN!

In amidst of all the halloween parties, trick-or-treat candies and other indulgences that go along with the holiday, it's nice to know that there are festive recipes out there that are good for you too! This seasonal black and orange dish definitely hits the spot on a cool fall evening, and would be an excellent addition to just about any meal. To top it off, black rice is extremely nutritious - full of antioxidants, fibre and vitamin E. I stumbled upon this website while writing this post - check it out if you're looking for more info or articles about this new superfood. With that said, if you aren't able to get your hands on some black rice and want to give this recipe a shot, any rice would work just fine.

Spooky Black Rice with Carrots and Roasted Acorn Squash

Ingredients

1 cup black rice, cooked
2 cups water or broth (I used homemade bone broth)
1 acorn squash, peeled, seeded and cubed
4 carrots, chopped (peel if not organic)
1 tbsp olive oil
1 tsp dried thyme (or 1 tbsp fresh)
1 tsp dried oregano
1/2 cup raw pecans
1-2 large handfuls of arugula
salt & pepper to taste

Directions

Black rice should ideally be soaked for about an hour prior to rinsing and cooking. If you're pressed for time, make sure you give the rice a good rinse until the water runs clear. Bring rice and water/broth to a boil, reduce heat, cover, and let simmer for 25-30 mins if soaked, or 60-70 if unsoaked.

While rice is cooking, preheat oven to 450 F.
Prepare the squash and carrots, and once chopped to your liking, toss in olive oil and herbs until coated. Place on a baking sheet and roast for about 15 minutes. Remove pan, turn veg, and place back in the oven for another 10-12 minutes until fork tender (it's ok if the squash is slightly blackened). In the last few minutes, toss pecans onto the baking sheet to lightly toast.

Remove from oven, combine with cooked rice and arugula.
Season with salt and pepper, if using, and enjoy!


Hope you all enjoy the halloween festivities you have planned tonight! Don't forget to eat a delicious, satisfying dinner before handing out candies to the trick-or-treaters tonight to avoid temptation.

Saturday, 5 October 2013

Pumpkin Oatmeal Chocolate Chip Cookies


I was going to wait until next week to share this recipe with you, but I couldn't keep these cookies a secret so I just had to post it tonight. That and I'm procrastinating packing and cleaning my house before people come to see it in a couple days (we're moving to another part of the city).

These were a bit of an experiment to start, taking inspiration from this recipe and making them completely vegan, gluten free and refined sugar free. I wasn't sure right from the get-go how these would turn out, and it didn't help matters that I forgot to set a timer and thought I'd for sure burned them when I realized they'd been in for half an hour. But in the end, these turned out SO well. I'm even going to be bold and say that they might be the best (vegan, gluten free) cookies I've ever made! They're crunchy on the outside, and oh so delicious and chewy on the inside.


Pumpkin Oatmeal Chocolate Chip Cookies

Ingredients

1 1/2 cup all purpose gluten free flour
1/2 tsp baking soda
1/2 tsp baking powder
1/2 tsp cinnamon
1/2 tsp nutmeg
1/4 tsp ginger powder
1/4 tsp allspice
1 flax egg (1 tbsp ground flax + 3 tbsp hot water)
2 tbsp coconut oil
1/2 cup pumpkin puree
1/3 cup brown rice syrup
1/3 cup maple syrup
1 tsp vanilla extract
1 cup gluten free rolled oats
1/3 cup dark chocolate chips (optional, but delicious)


Directions

  1. Preheat oven to 350F.
  2. Start by making the flax egg, by combining freshly ground flax with hot water. Allow this to sit for a few minutes while you combine the dry ingredients. I made the "egg" in the large mixing bowl to avoid dirtying an extra bowl.
  3. In a medium sized bowl, mix together the dry ingredients.
  4. In a large mixing bowl, beat together the coconut oil and flax egg. My coconut oil wasn't melted so it doesn't matter if yours is or not.
  5. Mix in remaining wet ingredients.
  6. Slowly add dry ingredients to wet, and beat until a smooth texture is reached.
  7. Fold in oats and chocolate chips.
  8. Spoon dough onto a baking sheet lined with parchment paper. They won't spread too much, so they only need to be an inch or so apart. 
  9. Bake for about 20-30 minutes, or until golden brown on top. The longer you leave them the crunchier they will be, so cooking time is up to your personal taste.


Notes

This was my first time baking with brown rice syrup, and I loved how crunchy it turned the cookies on the outside while keeping them moist and chewy on the inside. Brown rice syrup can be found at a health food store near the other sweeteners. If you're not worried about these being vegan, feel free to use honey instead.

My batch probably would have made 13 or 14 cookies, but I ended up eating the remaining batter once I had 12 cookies on my sheet. You could of course do the same (it was delicious, and egg-free so ok to eat raw), or if you have a large baking sheet you might be able to make your cookies a bit bigger.


I hope you are enjoying this pumpkin season as much as I am! Let me know how these turn out for you in the comments below, or over on Facebook!


Thursday, 26 September 2013

Hearty Gluten Free Vegan Pancakes


Who doesn't enjoy waking up to the sweet smell of pancakes wafting from the kitchen on a cool fall morning? There's nothing quite like a warm breakfast to set you up for the day ahead. This isn't an every day breakfast for me, but it's definitely a welcome treat when I do make them. The best part is there's very little to clean up as it's all made in the blender!

First thing each morning I try to drink about a litre of water and have a bit of fruit to get things moving. These babies would be amazing following a crisp, juicy organic apple. I use sorghum flour, but an all purpose gluten free flour would work well too (or regular old whole wheat flour if that's what you're into). The trick with these being gluten free is to let the batter sit a bit to let things thicken up, or your might have a bit of trouble flipping the first few. Feel free to be creative and add sliced bananas or frozen blueberries when you throw them on the griddle. Also, the toppings are endless, from simple maple syrup to berries, nut butters, jam, you name it!


Ingredients


  • 2 tbsp whole flax seeds
  • 1 1/2 cup water (or non dairy milk of your choice)
  • 3/4 cup sorghum flour
  • 2 tsp baking powder
  • 1/2 tsp baking soda
  • 1/2 cup oats (make sure they're certified gluten free if you're sensitive to gluten)
  • 1 ripe banana
  • 1 tsp cinnamon
  • 1 tsp vanilla extract
  • 2 tbsp coconut
  • 2 tbsp sunflower seeds
  • 1 tbsp coconut oil


Directions

Grind flax seeds in blender, and add water or milk. Blend on medium speed until well combined and let stand in blender.
Add remaining ingredients.
Blend on med/high for about 30 seconds.
Let batter sit for 5-10 minutes to allow it to thicken.
Heat griddle or frying pan to low-med heat and melt enough coconut oil to lightly cover surface.
Pour pancake mix from blender onto heated pan. Flip after a minute or two, or when bubbles form on the surface.
Makes about 10 medium sized pancakes.


Enjoy!

Thursday, 12 September 2013

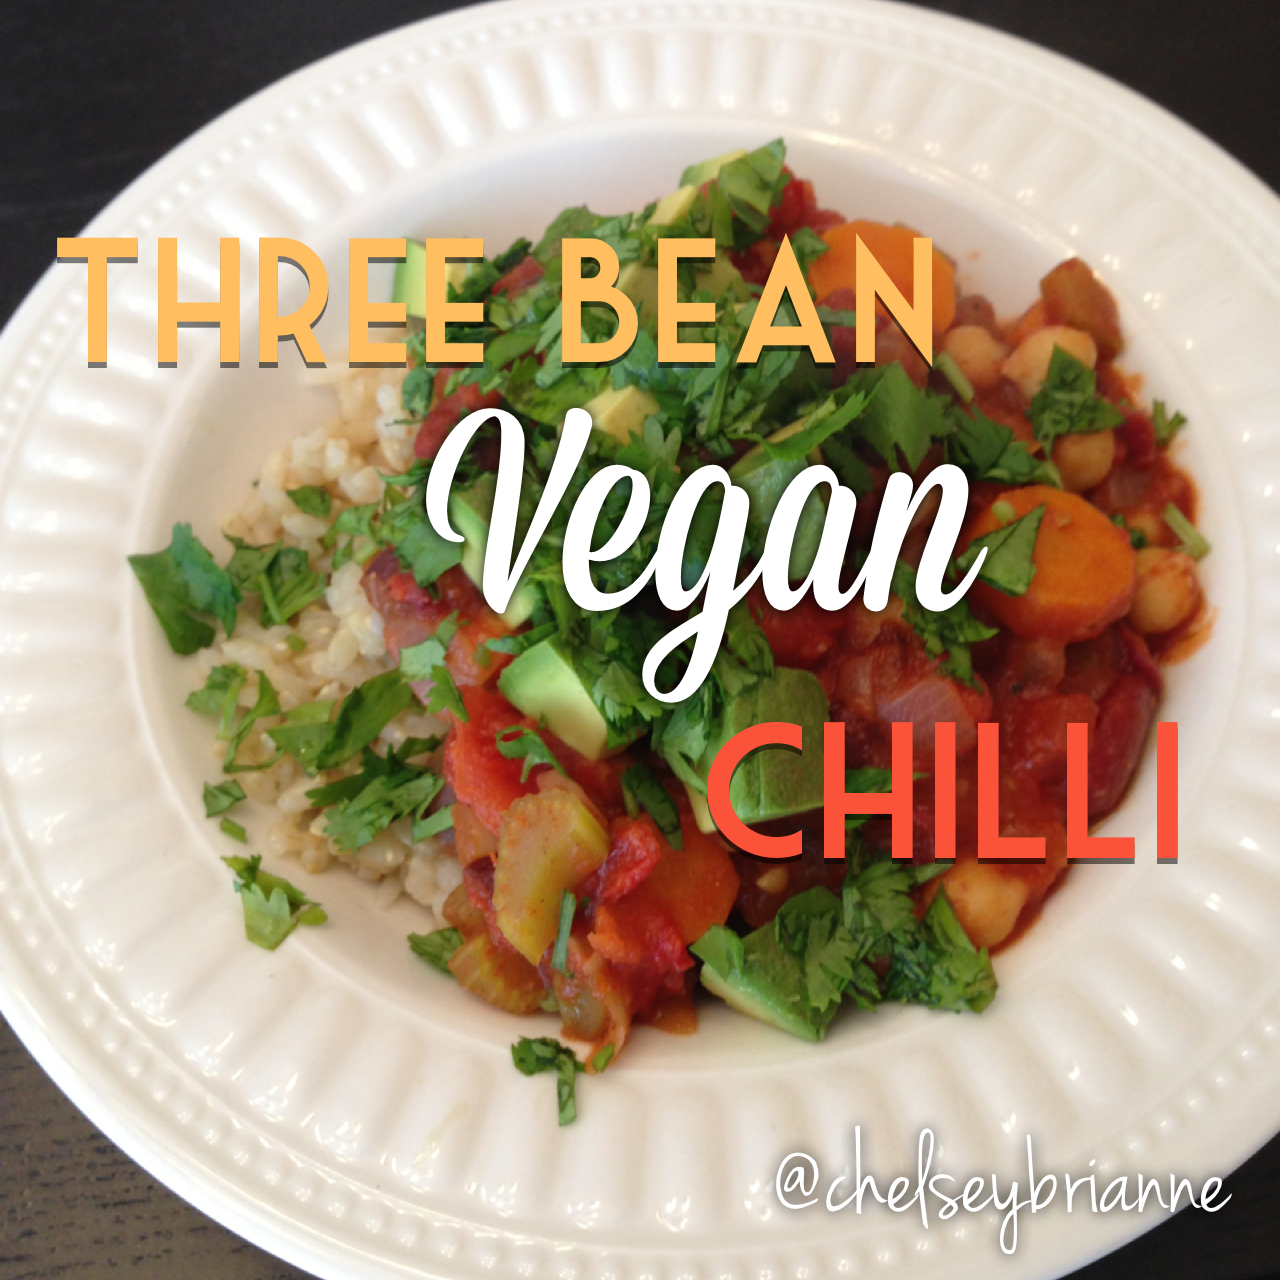
Three Bean Vegan Chilli


This recipe caught my eye when I recently saw it on MindBody Green (one of my go-to websites for recipes and holistic health and yoga), so I whipped up a batch and put my own spin on it based on what I had in the kitchen and this deliciousness was the result! It's perfect for a cool fall day - or whenever, really - and is easy to freeze and reheat if you don’t eat it all at once. It makes a fair amount - probably enough to serve 4-5 people. I made sure to set aside some smaller portions to throw in the freezer so I don’t have to thaw the entire batch just to enjoy a little bit.


Here's what you'll need:

Ingredients


Chilli

  • 1 large white onion, diced
  • 3 carrots, peeled and diced (about 1.5 cups)
  • 2 celery sticks, chopped
  • 2-3 garlic cloves, minced
  • 2 cups cooked black beans (or 16 oz canned, drained & rinsed) *
  • 2 cups cooked kidney beans (or 16 oz canned, drained & rinsed) *
  • 2 cups cooked chickpeas (or 16 oz canned, drained & rinsed) *
  • 7 roma tomatoes, chopped
  • 1 small can tomato paste (6 oz or 156 ml, about 1/2 cup)
  • 1 tbsp olive oil
  • 1.5 tbsp cumin
  • 1.5 tbsp dried oregano
  • 1/2 tsp cayenne pepper
  • 2 bay leaves (optional) **
  • salt and pepper to taste

Garnish

  • 1 avocado
  • 1-2 limes, juiced
  • 1/2 cup cilantro, chopped

Directions


Heat large pot on med heat and add oil.
Add onion, carrots, celery, garlic and sauté until fragrant and onions start to turn opaque.
Add remaining chilli ingredients and simmer for about 20 minutes.
Remove bay leaves and serve topped with avocado, fresh lime juice and cilantro.
Enjoy!

Notes

* See my post about cooking dried beans here
** If using bay leaves, it can be helpful to tie them in a piece of cheesecloth to easily remove prior to serving.


As always, thanks so much for reading! Let me know how this turns out for you :)
Lots of love and light
Xoxo

Friday, 30 August 2013

Homemade Peanut Butter Cups


Warning: These are highly addictive

I made these beauties the other day and they definitely didn’t last very long. Once you get the basic recipe down, try experimenting with other nut butters or find a way to add your own special touch by adding a creative topping like coconut or cacao nibs.

Chocolate

2 tbsp raw cacao
2 tbsp melted coconut oil
1-2 tsp natural sweetener (maple syrup, honey, agave, etc.)

Peanut Butter

2 tbsp peanut butter (or nut butter of your choice)
1 tbsp melted coconut oil
1 tsp natural sweetener
small pinch of Himalayan salt (optional)

  1. Combine the chocolate and peanut butter filling ingredients in two separate bowls.
  2. Using either silicone baking cups or half of a muffin tin lined with cupcake liners, pour the peanut butter mixture first, followed by the chocolate, into 6 baking cups. 
  3. Place in the freezer to set for about an hour.
  4. Unwrap and enjoy!


Give these bad boys a shot and let me know what you think!

Tuesday, 6 August 2013

Homemade Hemp Milk & Matcha Goji Berry Chia Seed Pudding

Non-dairy milk has become increasingly popular over the last few years, and rightly so. Many people are beginning to realize that dairy is not the health food that it is marketed as. Perhaps you are one of those very people, and have experienced first hand the bloating, acne, excess phlegm or sinus infections that are all associated to dairy consumption. Did you know that as we age, the majority of humans lose the lactase enzyme that is required to digest milk? It’s great to know that there are so many options available to substitute the cows milk that so many of us are accustomed to drinking. If you take a look at just about any grocery store you’ll see options including soy milk, rice milk, almond milk, and my new favourite – hemp milk. Although this is my new go-to, you won’t find me drinking the store bought stuff. Not when the real deal is so easy to make at home


When I say easy, I mean really easy. This milk is the quickest, most delicious (not to mention nutritious) non-dairy milk I’ve ever made. Knowing that you’re making your own means you know exactly what’s in it. No pesky preservatives or nasty inflammatory causing carrageenan. Here’s what you’ll need:

Homemade Hemp Milk


Ingredients

  • 1 cup shelled hemp seeds (also called hemp hearts)
  • 3 cups filtered water
  • 1tbsp maple syrup (or other natural sweetener)
  • ½ tsp vanilla (optional)

  1. Combine all ingredients, and blend on high for about a minute (I use my vitamix at variable speed 7, but any blender will do)
  2. Pour milk into a jar and store covered in the fridge for up to a week


So simple, and there’s no soaking or straining required as there is with nut milks such as almond milk. If you’re curious about what nasties might be lurking in store bought non-dairy milk, check out this article. Not only are you avoiding these potentially hazardous ingredients, you're also filling up on so many essential nutrients like healthy Omega 3 and 6 fatty acids, lots of protein, fibre, and trace minerals such as zinc, phosphorous, magnesium and iron. Just take a look at the nutritional info on my bag of hemp seeds from Manitoba Harvest.


One of my favourite ways to use my freshly made hemp milk is to make a chia seed pudding. I’ve been experimenting with different ingredients, but so far the most delicious one I've found is a matcha & goji berry chia seed pudding.


Matcha & Goji Berry Chia Seed Pudding


Ingredients

  • 1 cup hemp milk
  • ½ tsp matcha green tea powder
  • 3 tbsp chia seeds
  • ¼ cup goji berries
  • fresh fruit or berries

  1. Blend hemp milk with matcha powder until well combined.
  2. Pour mixture over chia seeds and goji berries
  3. Stir to combine, let sit for 15 minutes, stirring once every 5 mins. Instead of stirring you could shake the ingredients in a jar to have a quick, grab and go breakfast
  4. Let sit covered in fridge overnight (or at least an hour or two). To serve, top with berries or fresh fruit of your choice and enjoy!
Recipe inspired by Choosing Raw

I find this incredibly filling and energizing as a breakfast. The matcha powder contains caffeine, but it’s much more steady and long lasting than coffee and won’t give you the same jittery caffeine high. Every ingredient here is considered a superfood, all together boasting a huge amount of fibre, protein, complex (slow burning) carbohydrates, and healthy fats. Such a wonderful way to start your day on a healthy, nutritious note.


Matcha green tea powder can be found in many health food stores, but I found the one above from my local London Drugs. If you're in western Canada and it's easier to get to a to a London Drugs check there first! It's not super cheap (about $30 for 100g), but since a single serving is about a 1/2 tsp, a little goes a long way. If you haven't tried it yet, I would highly recommend it. Not only is it great in the chia pudding above, but can be a great addition to smoothies or frozen banana soft serve (which is another recipe for another day).

Enjoy! And as always, thanks for reading! Please leave me a note and let me know what you think :)

Love & Light