Friday, 4 October 2013

Pumpkin 101


Well, ladies and gentlemen, it's that time of year - pumpkin season! I am so in love with pumpkins in all their versatile glory. This wonderful winter squash can be used in so many ways. There's pumpkin pie, pumpkin smoothies, pumpkin pie, the list goes on! Even the seeds can be roasted and enjoyed as a delicious crunchy treat.

Did you know that aside from pumpkins being delicious they are also incredibly good for you? High in fibre, vitamins A, C and E, iron, potassium and antioxidant beta-carotene, pumpkins and their seeds boast a variety of health benefits.

How to Roast a Pumpkin


If you're planning on roasting your own pumpkin, you'll need to start with the right kind. Ignore the big field pumpkins you see outside the grocery store - these are great for jack-o'-lanterns but not much else. You'll want to look for a Sugar Pumpkin, which is much smaller, and much tastier. Look for a pumpkin that is heavy for it's size.

When you've picked the perfect pumpkin, the first step is to slice it in half. This can take a bit of upper body strength, so be prepared to use your muscles!

Once halved, scoop out the seeds and stringy core until the inside is free of any stringy flesh.


Preheat your oven to about 400F, and place pumpkin halves cut side down on a lightly oiled baking sheet. I line mine with tinfoil prior to baking to make for easy clean up.

Bake for about 45 mins to an hour or until a fork can easily pierce the pumpkin's skin.

Remove from the oven and let cool slightly before eating, or using to make homemade pumpkin puree...

How to Make Your Own Pumpkin Puree

Although the canned variety of pumpkin puree can be found year round, nothing beats a freshly roasted pumpkin straight out of the oven. Making homemade pumpkin puree is so simple once you've roasted your sugar pumpkin.

Simply scoop out the flesh, discarding the skins, and blend in a food processor or blender until smooth.


Pumpkin puree can be stored in a sealed container in the fridge for about a week, or in the freezer to enjoy year round! 

How to Roast Perfect Pumpkin Seeds

Roasted pumpkin seeds make for a delicious, healthy treat, and they're super easy to make. I usually toss the seeds in olive oil and sprinkle a bit of herbamare or sea salt prior to roasting, but the flavour possibilities are endless!

Once you've halved your pumpkin, you'll need to separate the seeds from the stringy bits of flesh. There's not really anything you can do with the leftover pumpkin flesh, so that can head right for the compost.

Rinse the seeds, and place in a pot filled with salted water - about 1/2 to 1 tsp for a medium pot.

Bring the water and seeds to a boil, and reduce slightly to a simmer for 10 minutes (uncovered).

Drain the seeds and dry slightly with a clean tea towel or paper towel (they might stick a little bit, but just use your fingers to get them off the towel).

Next, place on a baking sheet and massage with a small amount (1/2 tsp or so) of extra virgin olive oil and seasoning of your choice (sprinkling them with a bit of fine grain salt is always simple and delicious).

Lay out the seeds in a single layer, and bake for about 18-20 minutes, stirring once about halfway through.

In the last few minutes of cooking remove a couple seeds, let cool and have a taste. You want your seeds to be crunchy, and the inner seed should be slightly golden but not brown. When done, remove seeds, let cool slightly, and enjoy!


Roasted pumpkin seeds can be eaten whole, or by cracking open to eat the inner seed.

I hope you enjoy this pumpkin season as much as I already am! Please feel free to share your favourite pumpkin recipes in the comments below, and keep your eye out for my Pumpkin Spice Muffin recipe coming soon!

Thursday, 26 September 2013

Hearty Gluten Free Vegan Pancakes


Who doesn't enjoy waking up to the sweet smell of pancakes wafting from the kitchen on a cool fall morning? There's nothing quite like a warm breakfast to set you up for the day ahead. This isn't an every day breakfast for me, but it's definitely a welcome treat when I do make them. The best part is there's very little to clean up as it's all made in the blender!

First thing each morning I try to drink about a litre of water and have a bit of fruit to get things moving. These babies would be amazing following a crisp, juicy organic apple. I use sorghum flour, but an all purpose gluten free flour would work well too (or regular old whole wheat flour if that's what you're into). The trick with these being gluten free is to let the batter sit a bit to let things thicken up, or your might have a bit of trouble flipping the first few. Feel free to be creative and add sliced bananas or frozen blueberries when you throw them on the griddle. Also, the toppings are endless, from simple maple syrup to berries, nut butters, jam, you name it!


Ingredients


  • 2 tbsp whole flax seeds
  • 1 1/2 cup water (or non dairy milk of your choice)
  • 3/4 cup sorghum flour
  • 2 tsp baking powder
  • 1/2 tsp baking soda
  • 1/2 cup oats (make sure they're certified gluten free if you're sensitive to gluten)
  • 1 ripe banana
  • 1 tsp cinnamon
  • 1 tsp vanilla extract
  • 2 tbsp coconut
  • 2 tbsp sunflower seeds
  • 1 tbsp coconut oil


Directions

Grind flax seeds in blender, and add water or milk. Blend on medium speed until well combined and let stand in blender.
Add remaining ingredients.
Blend on med/high for about 30 seconds.
Let batter sit for 5-10 minutes to allow it to thicken.
Heat griddle or frying pan to low-med heat and melt enough coconut oil to lightly cover surface.
Pour pancake mix from blender onto heated pan. Flip after a minute or two, or when bubbles form on the surface.
Makes about 10 medium sized pancakes.


Enjoy!

Thursday, 19 September 2013

How to Improve Your Relationship with Food


Do you happen to find yourself in an unhealthy relationship with the food you're eating? It's not uncommon to use food as a way to mask things we may not want to focus on, or to fulfill us emotionally when certain areas of our lives are unbalanced. Read on for my suggestions to help get you back on track.


Eat Only When You’re Hungry


We’ve all done it – opened the door of the fridge and stood there, unsure what we want but sure that we want something. Often these ambiguous cravings are a cry for water. Instead of peering longingly into the fridge, drink a glass of water or go for a walk. Wait a few minutes after that and see if you still want to eat. If you do, then go for it! Just pay attention to what you’re eating and why. If it’s to satisfy something unrelated to hunger or to provide a distraction from something else, try to recognize what that might be and think of different activities besides eating that might be healthier for you. Think about things like your personal relationships, the fulfillment you're getting at work, and your stress levels. Many factors can contribute to emotional eating, and identifying what that might be is the first step in making the necessary changes.

Make Mealtime Special


How we eat is just as important as what we eat. Ever notice that when you eat while you’re rushed or stressed you tend to overeat and your digestion isn’t quite as good? It’s so common in our fast paced culture of drive ins and never ending to-do lists that we don’t give ourselves much time to nourish ourselves. Try this: for at least one meal this week, set aside at least half an hour with no distractions to enjoy the food you’re feeding yourself. When we eat we go into absorption mode. That means not only are we absorbing the nutrients in the food, but also our environment. If you turn off the tv, put your phone down, step away from your desk and enjoy your food with all your senses you might find you are much more satisfied and more nourished from your meal.

Keep a Food Journal


Writing down everything you eat in a day will not only keep you accountable for what you’re putting in your body, but is also a great tool to allow you to pinpoint any food sensitivities or triggers for health concerns like headaches or low energy. Try it out for one week! Write down what you ate, how you felt right away, and how you felt about an hour or two after. Often when we eat junk food we feel awesome right off the bat, but not long after we start to feel sluggish and unfocused. Don't worry about tracking calories or grams of fat, etc., but write out whatever it was, in whatever detail you're comfortable with. Instead of thinking of food journaling as a chore, start to recognize it as a way to connect with yourself and be more in tune with your body.


Good luck on your health journey, and as always please leave a comment and let me know how you're doing!


Thursday, 12 September 2013

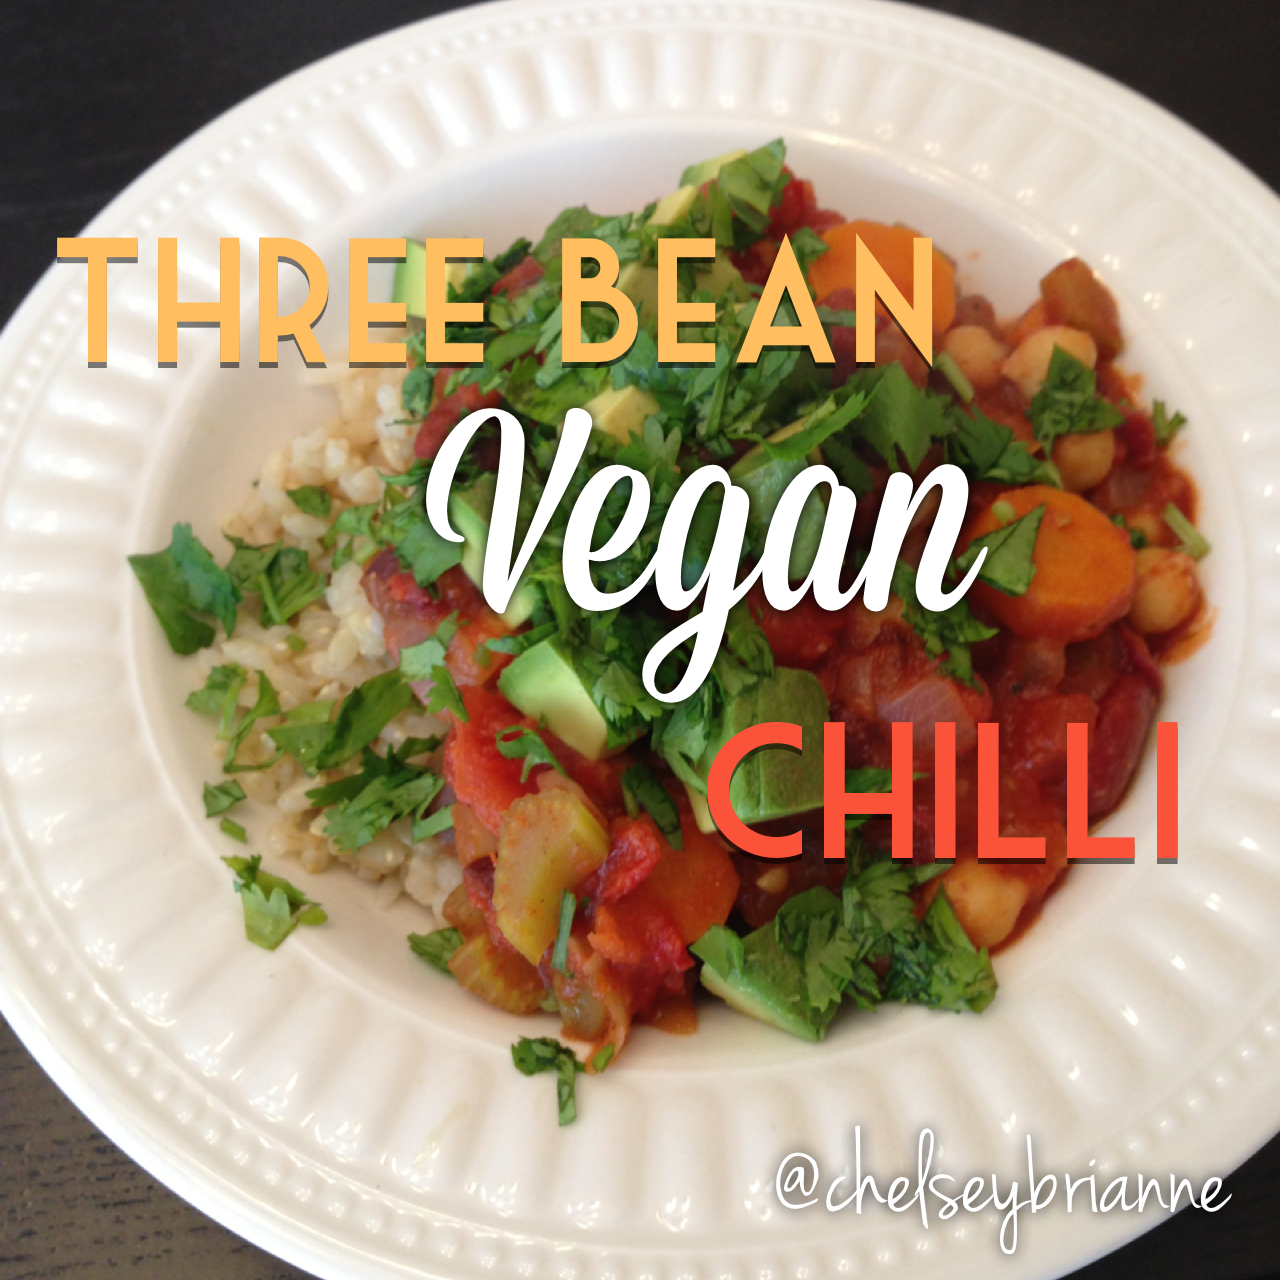
Three Bean Vegan Chilli


This recipe caught my eye when I recently saw it on MindBody Green (one of my go-to websites for recipes and holistic health and yoga), so I whipped up a batch and put my own spin on it based on what I had in the kitchen and this deliciousness was the result! It's perfect for a cool fall day - or whenever, really - and is easy to freeze and reheat if you don’t eat it all at once. It makes a fair amount - probably enough to serve 4-5 people. I made sure to set aside some smaller portions to throw in the freezer so I don’t have to thaw the entire batch just to enjoy a little bit.


Here's what you'll need:

Ingredients


Chilli

  • 1 large white onion, diced
  • 3 carrots, peeled and diced (about 1.5 cups)
  • 2 celery sticks, chopped
  • 2-3 garlic cloves, minced
  • 2 cups cooked black beans (or 16 oz canned, drained & rinsed) *
  • 2 cups cooked kidney beans (or 16 oz canned, drained & rinsed) *
  • 2 cups cooked chickpeas (or 16 oz canned, drained & rinsed) *
  • 7 roma tomatoes, chopped
  • 1 small can tomato paste (6 oz or 156 ml, about 1/2 cup)
  • 1 tbsp olive oil
  • 1.5 tbsp cumin
  • 1.5 tbsp dried oregano
  • 1/2 tsp cayenne pepper
  • 2 bay leaves (optional) **
  • salt and pepper to taste

Garnish

  • 1 avocado
  • 1-2 limes, juiced
  • 1/2 cup cilantro, chopped

Directions


Heat large pot on med heat and add oil.
Add onion, carrots, celery, garlic and sauté until fragrant and onions start to turn opaque.
Add remaining chilli ingredients and simmer for about 20 minutes.
Remove bay leaves and serve topped with avocado, fresh lime juice and cilantro.
Enjoy!

Notes

* See my post about cooking dried beans here
** If using bay leaves, it can be helpful to tie them in a piece of cheesecloth to easily remove prior to serving.


As always, thanks so much for reading! Let me know how this turns out for you :)
Lots of love and light
Xoxo